こんにちは!
せのり(@senoriblog)です。
今回はAndroidアプリの画面間のデータ連携方法を紹介します。
今回は画面遷移時にデータを渡して、
遷移先画面で表示する方法を解説します。
上記の内容で解説します。
それでは、順番にみていきましょう。
プロジェクト構成
前回作成したプロジェクトを流用しています。
MainActivity - 遷移元画面
SubActivity - 遷移先画面
- activity_main.xml
- MainActivity.java
- activity_sub.xml
- SubActivity.java
前回の内容はこちら
-

-
【コピペでOK】Androidアプリ開発(画面遷移)
遷移元画面
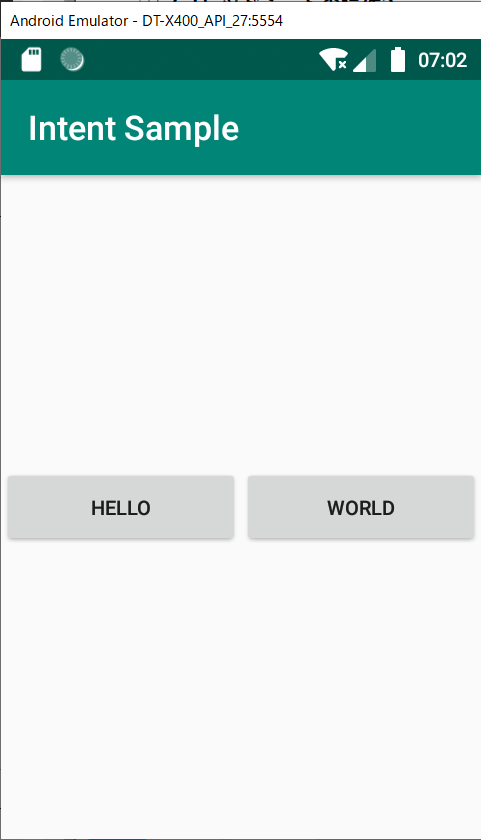
画面レイアウトは以下の通りです。

MainActivity.javaに画面間で連携するデータを設定します。
20~22行目が追加したソースです。
|
1 2 3 4 5 6 7 8 9 10 11 12 13 14 15 16 17 18 19 20 21 22 23 24 25 26 27 28 29 30 31 |
package com.example.myapplication; import androidx.appcompat.app.AppCompatActivity; import android.content.Intent; import android.os.Bundle; import android.view.View; import android.widget.Button; public class MainActivity extends AppCompatActivity { @Override protected void onCreate(Bundle savedInstanceState) { super.onCreate(savedInstanceState); setContentView(R.layout.activity_main); } public void onClick(View v) { // インテントの作成 Intent intent = new Intent(this, SubActivity.class); // 画面引継値のセット String str = ((Button) v).getText().toString(); intent.putExtra("str", str); // 遷移先画面の起動 if (intent.resolveActivity(getPackageManager()) != null) { startActivity(intent); } } } |
intent.putExtra("名前", "データ")で画面間でデータ連携ができます。
変数strにはクリックしたボタンのテキストがセットされます。
helloボタンをクリックするとhelloが、worldをクリックするとworldがセットされます。
putExtraの第一引数は任意の値を指定できます。
activity_main.xmlのソースも参考に掲載します。
helloボタン、worldボタンのクリックイベントはともに
android:onClick="onClick"
として、クリックした時にonClickメソッドを実行するように設定しています。
|
1 2 3 4 5 6 7 8 9 10 11 12 13 14 15 16 17 18 19 20 21 22 23 24 25 26 27 28 29 30 31 32 33 34 35 |
xml version="1.0" encoding="utf-8"?> <androidx.constraintlayout.widget.ConstraintLayout xmlns:android="http://schemas.android.com/apk/res/android" xmlns:app="http://schemas.android.com/apk/res-auto" xmlns:tools="http://schemas.android.com/tools" android:layout_width="match_parent" android:layout_height="match_parent" tools:context=".MainActivity"> <LinearLayout android:layout_width="match_parent" android:layout_height="wrap_content" android:orientation="horizontal" app:layout_constraintTop_toTopOf="parent" app:layout_constraintBottom_toBottomOf="parent"> <Button android:id="@+id/button_hello" android:layout_width="0dp" android:layout_height="wrap_content" android:layout_weight="1" android:text="@string/button_hello" android:onClick="onClick"/> <Button android:id="@+id/button_world" android:layout_width="0dp" android:layout_height="wrap_content" android:layout_weight="1" android:text="@string/button_world" android:onClick="onClick"/> </LinearLayout> </androidx.constraintlayout.widget.ConstraintLayout> |
遷移先画面
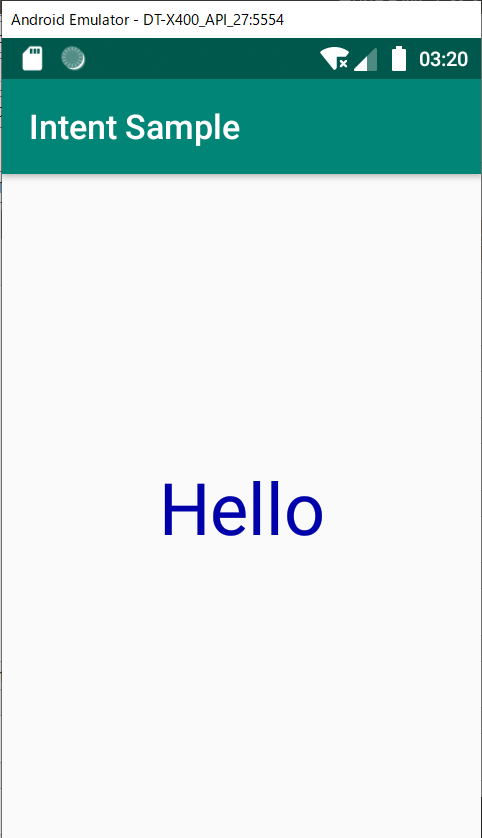
画面レイアウトは以下の通りです。

MainActivityから連携された値を受け取るようにSubActivity.javaを編集します。
17~19行目が追加したソースです。
|
1 2 3 4 5 6 7 8 9 10 11 12 13 14 15 16 17 18 19 20 21 |
package com.example.myapplication; import androidx.appcompat.app.AppCompatActivity; import android.os.Bundle; import android.widget.TextView; public class SubActivity extends AppCompatActivity { @Override protected void onCreate(Bundle savedInstanceState) { super.onCreate(savedInstanceState); setContentView(R.layout.activity_sub); TextView textView = findViewById(R.id.textView); // 画面引継値の取得 String str = (String) getIntent().getSerializableExtra("str"); textView.setText(str); } } |
getIntent().getSerializableExtra("名前")でMainActivityからの連携値を受け取っています。
"名前"部分はMainActivityで記載したものと同じ値にしてください。
今回連携値はString型なので、受け取る際もStringにキャストしています。
型はintやListなど他の型でも連携可能です。
textView.setText(str);で受け取った値をTextViewにセットしています。
クリックしたボタンのテキストが連携されたら成功です!
